Day 20: Stack & Positioned
Master the Z-axis dimension and create professional overlapping UIs with Stack and Positioned—the secret behind every profile badge, image overlay, and floating element you see in top apps.

မနေ့က flexbox အကြောင်းတွေ ဆွေးနွေးပြီးပြီဆိုတော့ ဒီနေ့တော့ flex မဟုတ်ဘဲ widget တွေ တခုပေါ် တခုထပ်တဲ့အကြောင်း ဆွေးနွေးကြရအောင်ပါ။ UI တွေ တည်ဆောက်တဲ့အခါ component တွေ ဘယ်ညာအပေါ်အောက် စီတာတွေတင်မဟုတ်ဘဲ တခုပေါ်တခု တည်ဆောက်ရတာတွေလဲ ရှိပါတယ်။ ဥပမာဆိုရင် profile image အပေါ်ထောင့်မှာ online status ပြနေတာမျိုးမြင်ဖူးကြမယ်ထင်ပါတယ်။ ဒီလိုမျိုး view တွေ တည်ဆောက်ချင်တဲ့အခါမှာတော့ Container တို့၊ Row တို့၊ Column တို့နဲ့ အဆင်မပြေပါဘူး။ ဒီတော့ view တခုပေါ်တခု ထပ်ပြီးတော့ အပေါ်က view ကိုလဲ ကိုယ်လိုချင်တဲ့ နေရာမျိုးမှာ ထားချင်တဲ့အခါ ဘယ်လို လုပ်ကြမလဲဆိုတာကိုတော့ ဒီနေ့မှာ လေ့လာလိုက်ကြရအောင်ပါ။
ရှေ့ရက်တွေက ဆွေးနွေးခဲ့တဲ့ Row တို့ Column တို့ထဲမှာ တခုထက်ပိုတဲ့ widget တွေ ထည့်ပေးလို့ရတဲ့ children ဆိုတာ ရှိပါတယ်။ ဒီ children ထဲမှာ ထည့်ထားတဲ့ component/widget တွေကို အလျားလိုက် ဒါမှမဟုတ် ဒေါင်လိုက် စီသွားပေးမှာပဲ ဖြစ်ပါတယ်။ Stack ဆိုတာကလဲ Row တို့ Column တို့လိုမျိုး တခုထက်ပိုတဲ့ component/widget တွေ သူ့ထဲမှာ ထည့်ပေးဖို့ children ဆိုတဲ့ property သူ့ထဲမှာ ပါပါတယ်။ ဒါပေမယ့် သူ့ရဲ့ အလုပ်လုပ်ပုံကတော့ အလျားလိုက်တွေ ဒေါင်လိုက်တွေ မဟုတ်ပါဘူး။ z-index လို့ခေါ်တဲ့ တခုပေါ်တခု ထပ်ပြီးတော့ အလုပ်လုပ်သွားတာမျိုး ပဲ ဖြစ်ပါတယ်။
Stack(
  children: [
    Container(width: 350, height: 350, color: Colors.blue),
    Container(width: 300, height: 300, color: Colors.green),
    Container(width: 250, height: 250, color: Colors.orange),
    Container(width: 200, height: 200, color: Colors.red),
  ],
);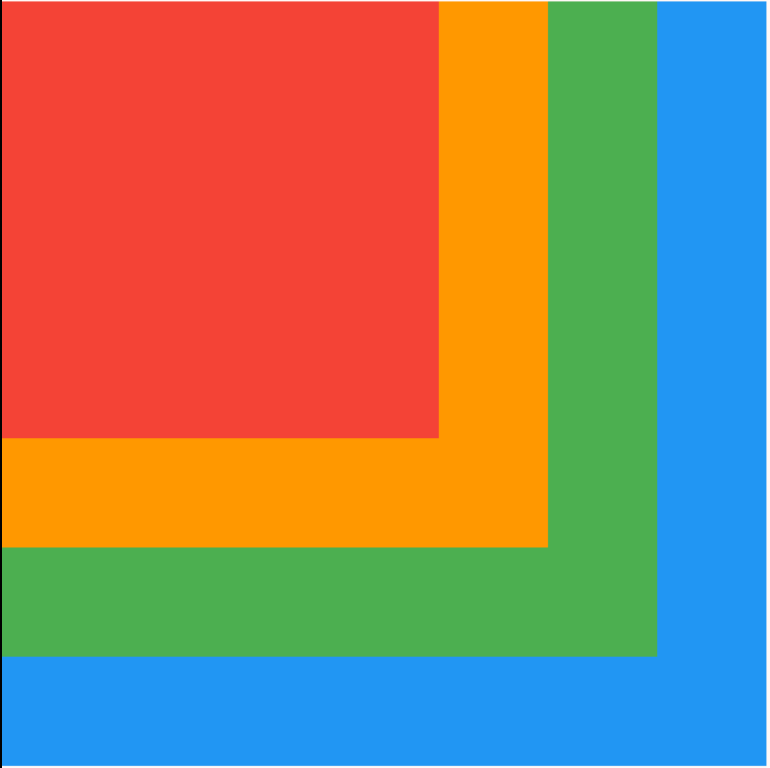
အပေါ်မှာ ပြထားတဲ့ code ကို ရေးလိုက်တဲ့အခါ အခုလိုမျိုး မြင်နေရမှာပဲ ဖြစ်ပါတယ်။ အရောင်တွေနဲ့ ထင်သာအောင်ပြထားတဲ့အတွက် တစ်ထပ်ပြီး တစ်ထပ် ကွဲကွဲပြားပြား မြင်နေရမယ်ထင်ပါတယ်။ Row တို့ Column တို့လို မဟုတ်ဘဲ widget တွေ တခုပေါ်တခု ထပ်နေတာကို သေချာလေး မြင်ပါလိမ့်မယ်။
သူ့ရဲ့ properties တွေကြည့်မယ်ဆို default အနေနဲ့ alignment က topStart ဆိုပြီး သတ်မှတ်ထားတာကြောင့် ဘယ်ဘက်ထိပ်မှာ သွားပြီးတော့ အကုန် ကပ်နေကြတာပဲ ဖြစ်ပါတယ်။ ကိုယ်လိုချင်တဲ့ တခြား alignment value ပြောင်းချင်ရင်လဲ အလွယ်တကူပဲ ပြောင်းလဲလိုက်လို့ ရပါတယ်။
Stack(
alignment: .center,
children: [
Container(width: 350, height: 350, color: Colors.blue),
Container(width: 300, height: 300, color: Colors.green),
Container(width: 250, height: 250, color: Colors.orange),
Container(width: 200, height: 200, color: Colors.red),
],
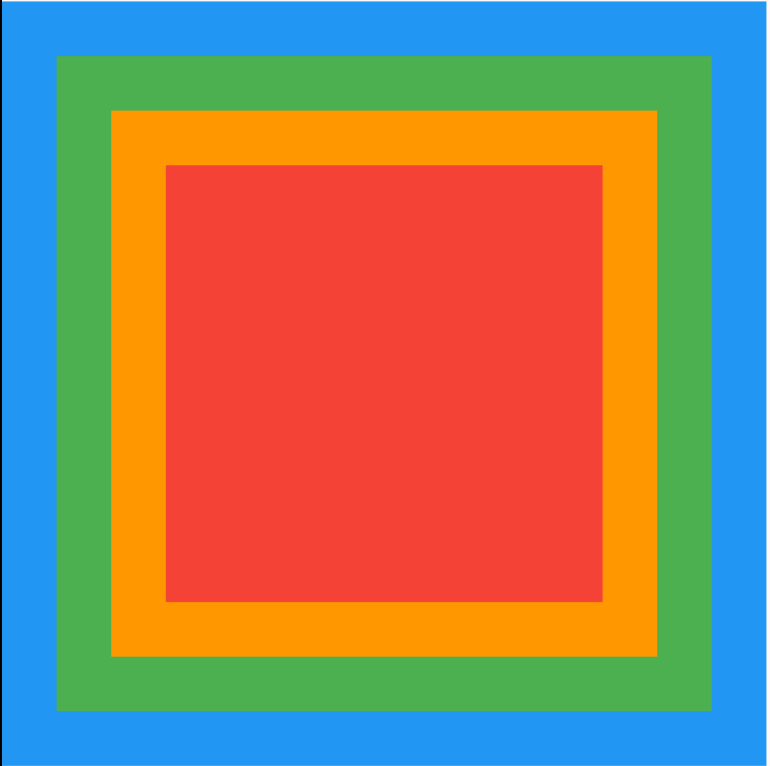
);အခုလိုမျိုး alignment ကို .center ဆိုပြီး ပြောင်းပေးလိုက်ရင် အခုလိုမျိုး ရရှိမှာပါ။ component/widget တွေက တခုပေါ်တခု ထပ်နေပြီး သူတို့ကိုတော့ အလယ်မှတ်နဲ့ alignment နဲ့ လုပ်ထားတာကို တွေ့ရမှာပါ။ ကိုယ်လိုချင်တဲ့ top/center/bottom, start/center/end ပေါ်မူတည်ပြီး နေရာချသွားလို့ ရပါတယ်။
တကယ်လို့ Stack ထဲက widget တွေကို နေရာချတဲ့အခါ alignment တခုထဲနဲ့ဆို လိုချင်တာ မရဘူးဆိုရင် Positioned widget ကို သုံးပြီးတော့ ဘယ်လို လုပ်လို့ရမလဲ ဆက်ကြည့်ကြရအောင်ပါ။
Stack(
  children: [
    Positioned(
      child: Container(width: 350, height: 350, color: Colors.blue),
    ),
    Positioned(
      top: 0,
      right: 0,
      child: Container(width: 300, height: 300, color: Colors.green),
    ),
    Positioned(
      bottom: 0,
      left: 0,
      child: Container(width: 250, height: 250, color: Colors.orange),
    ),
    Positioned(
      bottom: 0,
      right: 0,
      child: Container(width: 200, height: 200, color: Colors.red),
    ),
  ],
)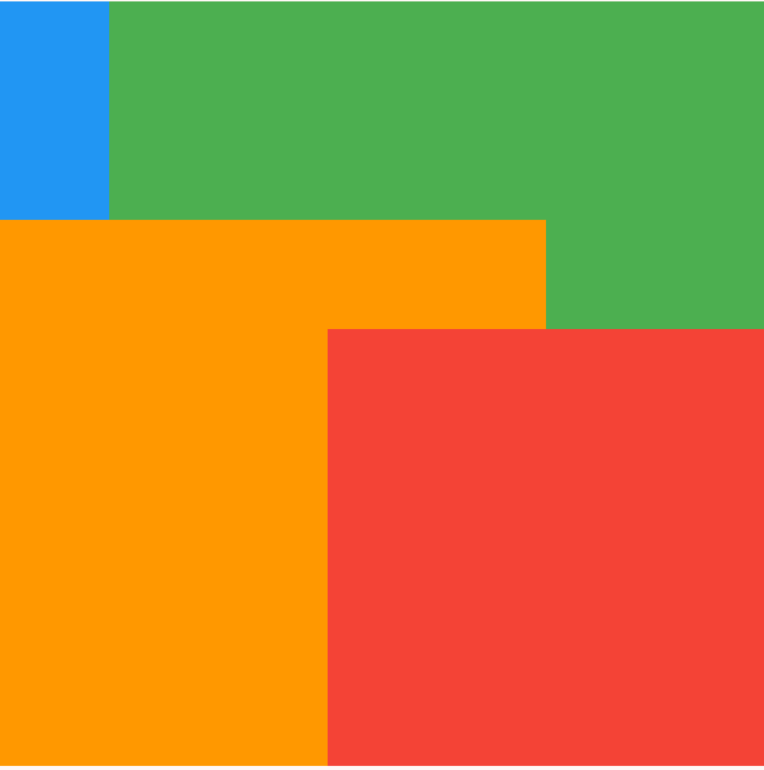
အပေါ်မှာ ပြထားတဲ့အတိုင်း ရေးလိုက်တဲ့အခါ အခုလိုမျိုး ထွက်လာမှာပဲ ဖြစ်ပါတယ်။ ဒီမှာကြည့်မယ်ဆို ပထမဆုံး Positioned widget ထဲမှာ ဘယ်ထောင့်ကို ကပ်ပါဆိုပြီး မရေးထားပါဘူး။ ဒီ့အတွက်ကြောင့် ရလာတဲ့ result မှာ အပေါ်ဆုံးရဲ့ size ကို အခြေခံပြီး တခြား widget တွေကို နေရာချထားတာ ဖြစ်ပါတယ်။ တကယ်လို့ ပထမဆုံး widget ကိုပါ ဘယ်ထောင့်ကို ကပ်ပါလို့ ရေးလိုက်ရင်တော့ အခုလိုမျိုး ရတဲ့နေရာကို အပြည့်ယူထားတာ ထွက်လာမှာပါ။ base widget လိုမျိုး မရှိတော့တဲ့အတွက် ရှိသမျှနေရာကို ယူပြီးတော့ widget တွေကို သက်ဆိုင်ရာ နေရာတွေမှာ နေရာချပေးသွားမှာပါ။

Examples
Profile picture နဲ့ online status လိုမျိုးဆို alignment တခုထဲနဲ့ လုပ်ရတာ အဆင်မပြေတာ့ပါဘူး။ ဒီတော့ Positioned ဆိုတဲ့ widget ကို သုံးသွားလို့ ရပါတယ်။
Stack(
  children: [
    const CircleAvatar(
      radius: 50,
      backgroundImage: NetworkImage('https://i.pravatar.cc/150?img=11'),
    ),
    Positioned(
      bottom: 0,
      right: 0,
      child: Container(
        width: 20,
        height: 20,
        decoration: BoxDecoration(
          color: Colors.green,
          shape: .circle,
          border: Border.all(color: Colors.white, width: 3),
        ),
      ),
    ),
  ],
)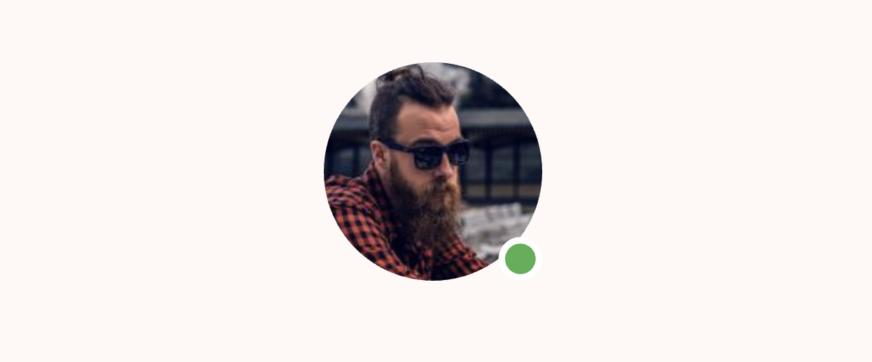
ဒီမှာ ပြထားတဲ့ code ဆိုရင် circle avatar ပေါ်မှာ Positioned နဲ့ green dot လေးကို ဆွဲထားလိုက်တာပဲ ဖြစ်ပါတယ်။ ဒါမျိုးကိုတော့ social media app မှာ တွေ့ရလေ့ ရှိမှာပါ။
ဒါတင်မကဘဲ ပုံပေါ်မှာ စာတွေ၊ floating notifications တွေ၊ loading app လိုမျိုးတွေမှာ Stack widget ကို သုံးလို့ရပါတယ်။
ဒါဆိုရင်တော့ Stack တို့ Positioned နဲ့ ပတ်သက်တာတွေ ရှင်းလောက်ပြီလို့ ထင်ပါတယ်။
ဒီနေ့ Day 20 အတွက်ကတော့ ဒီလောက်ပဲ ဖြစ်ပါတယ်။ အဆုံးထိ ဖတ်ပေးတဲ့အတွက် အများကြီး ကျေးဇူးတင်ပါတယ်။ နားမလည်တာတွေ အဆင်မပြေတာတွေ ရှိခဲ့ရင်လဲ အောက်မှာပေးထားတဲ့ discord server ထဲမှာ လာရောက်ဆွေးနွေးနိုင်ပါတယ်။ နောက်နေ့တွေမှာလဲ ဆက်လက်ပြီး sharing လုပ်သွားပေးသွားမှာ ဖြစ်တဲ့အတွက် subscribe လုပ်ထားဖို့ ဖိတ်ခေါ်ပါတယ်။
- Youtube: https://www.youtube.com/@arkarmintun
- Newsletter: https://arkar.dev/
- Discord: https://discord.gg/3xUJ6k6dkH