Day 23: ListView - Master Lists & Performance
Master Flutter ListView from ground up! Learn the difference between ListView(), ListView.builder(), and ListView.separated(). Discover why your lists are slow and how to achieve buttery smooth 60fps scrolling with lazy loading.

ဒီနေ့တော့ Flutter Widget တွေထဲမှာ အတွေ့အများဆုံး အရေးအပါဆုံးလို့ ပြောလို့ရတဲ့ ListView widget ကို ဆွေးနွေးသွားမှာပဲ ဖြစ်ပါတယ်။ သုံးနေကျ social media app တွေဖြစ်တဲ့ Facebook တို့, Instagram တို့, WhatsApp တို့မှာ မြင်နေကျ list တွေ ဘယ်လို အလုပ်လုပ်လဲ စဥ်းစားကြည့်ဖူးကြလား? scroll လိုက်တိုင်း data တွေကို ဆက်တိုက်ပြတဲ့အချိန်မှာ performance တွေ ကျမသွားဘဲ ဘယ်လိုတွေ ပြကြသလဲဆိုတာ ဒီနေ့ ဆွေးနွေးသွားမှာပဲ ဖြစ်ပါတယ်။
Scrollable Landscape
Scroll လို့ ရတဲ့ view တွေ တည်ဆောက်ဖို့အတွက်ဆို flutter မှာ ပါဝင်တဲ့ widget တွေကို အခုလိုမျိုး တွေ့ရပါလိမ့်မယ်။
- SingleChildScrollView() + Row/Column
- ListView()
- ListView.builder()
- ListView.separated()
- ListView.custom()
- CustomScrollView + Silvers
ဘယ်နေရာမှာ ဘယ်ဟာကို အသုံးပြုဖို့ အသင့်တော်ဆုံးလဲဆိုတာ သိခြင်းအားဖြင့် data တွေ ပြဖို့များနေလဲ performance မကျဘဲ user experience ကို ကောင်းမွန်အောင် လုပ်နိုင်မှာပဲ ဖြစ်ပါတယ်။ ဒီနေ့မှာတော့ SingleChildScrollView နဲ့ ListView တွေကို အဓိက ဆွေးနွေးသွားပါမယ်။ CustomScrollView အကြောင်းကိုတော့ နောက်နေ့တွေမှာ သီးသန့် ဆွေးနွေးသွားပါမယ်။
SingleChildScrollView
ဒါကတော့ အရိုးရှင်းဆုံး, beginner တွေ အသုံးပြုတာ အများဆုံးနဲ့ အသုံးပြုတာ လွဲသွားတဲ့အခါ performance ကို ထိခိုက်နိုင်တဲ့ အဓိက Widget ပဲ ဖြစ်ပါတယ်။ ရှိတဲ့ Column, Row တခုခုက screen size ထက် ကြီးသွားလို့ out of bound error လိုမျိုး အဝါအမဲ မြင်ရတဲ့အခါ SingleChildScrollView ထဲထည့်လိုက်ရင် အဆင်ပြေသွားတာမျိုး ကြုံဖူးပါလိမ့်မယ်။
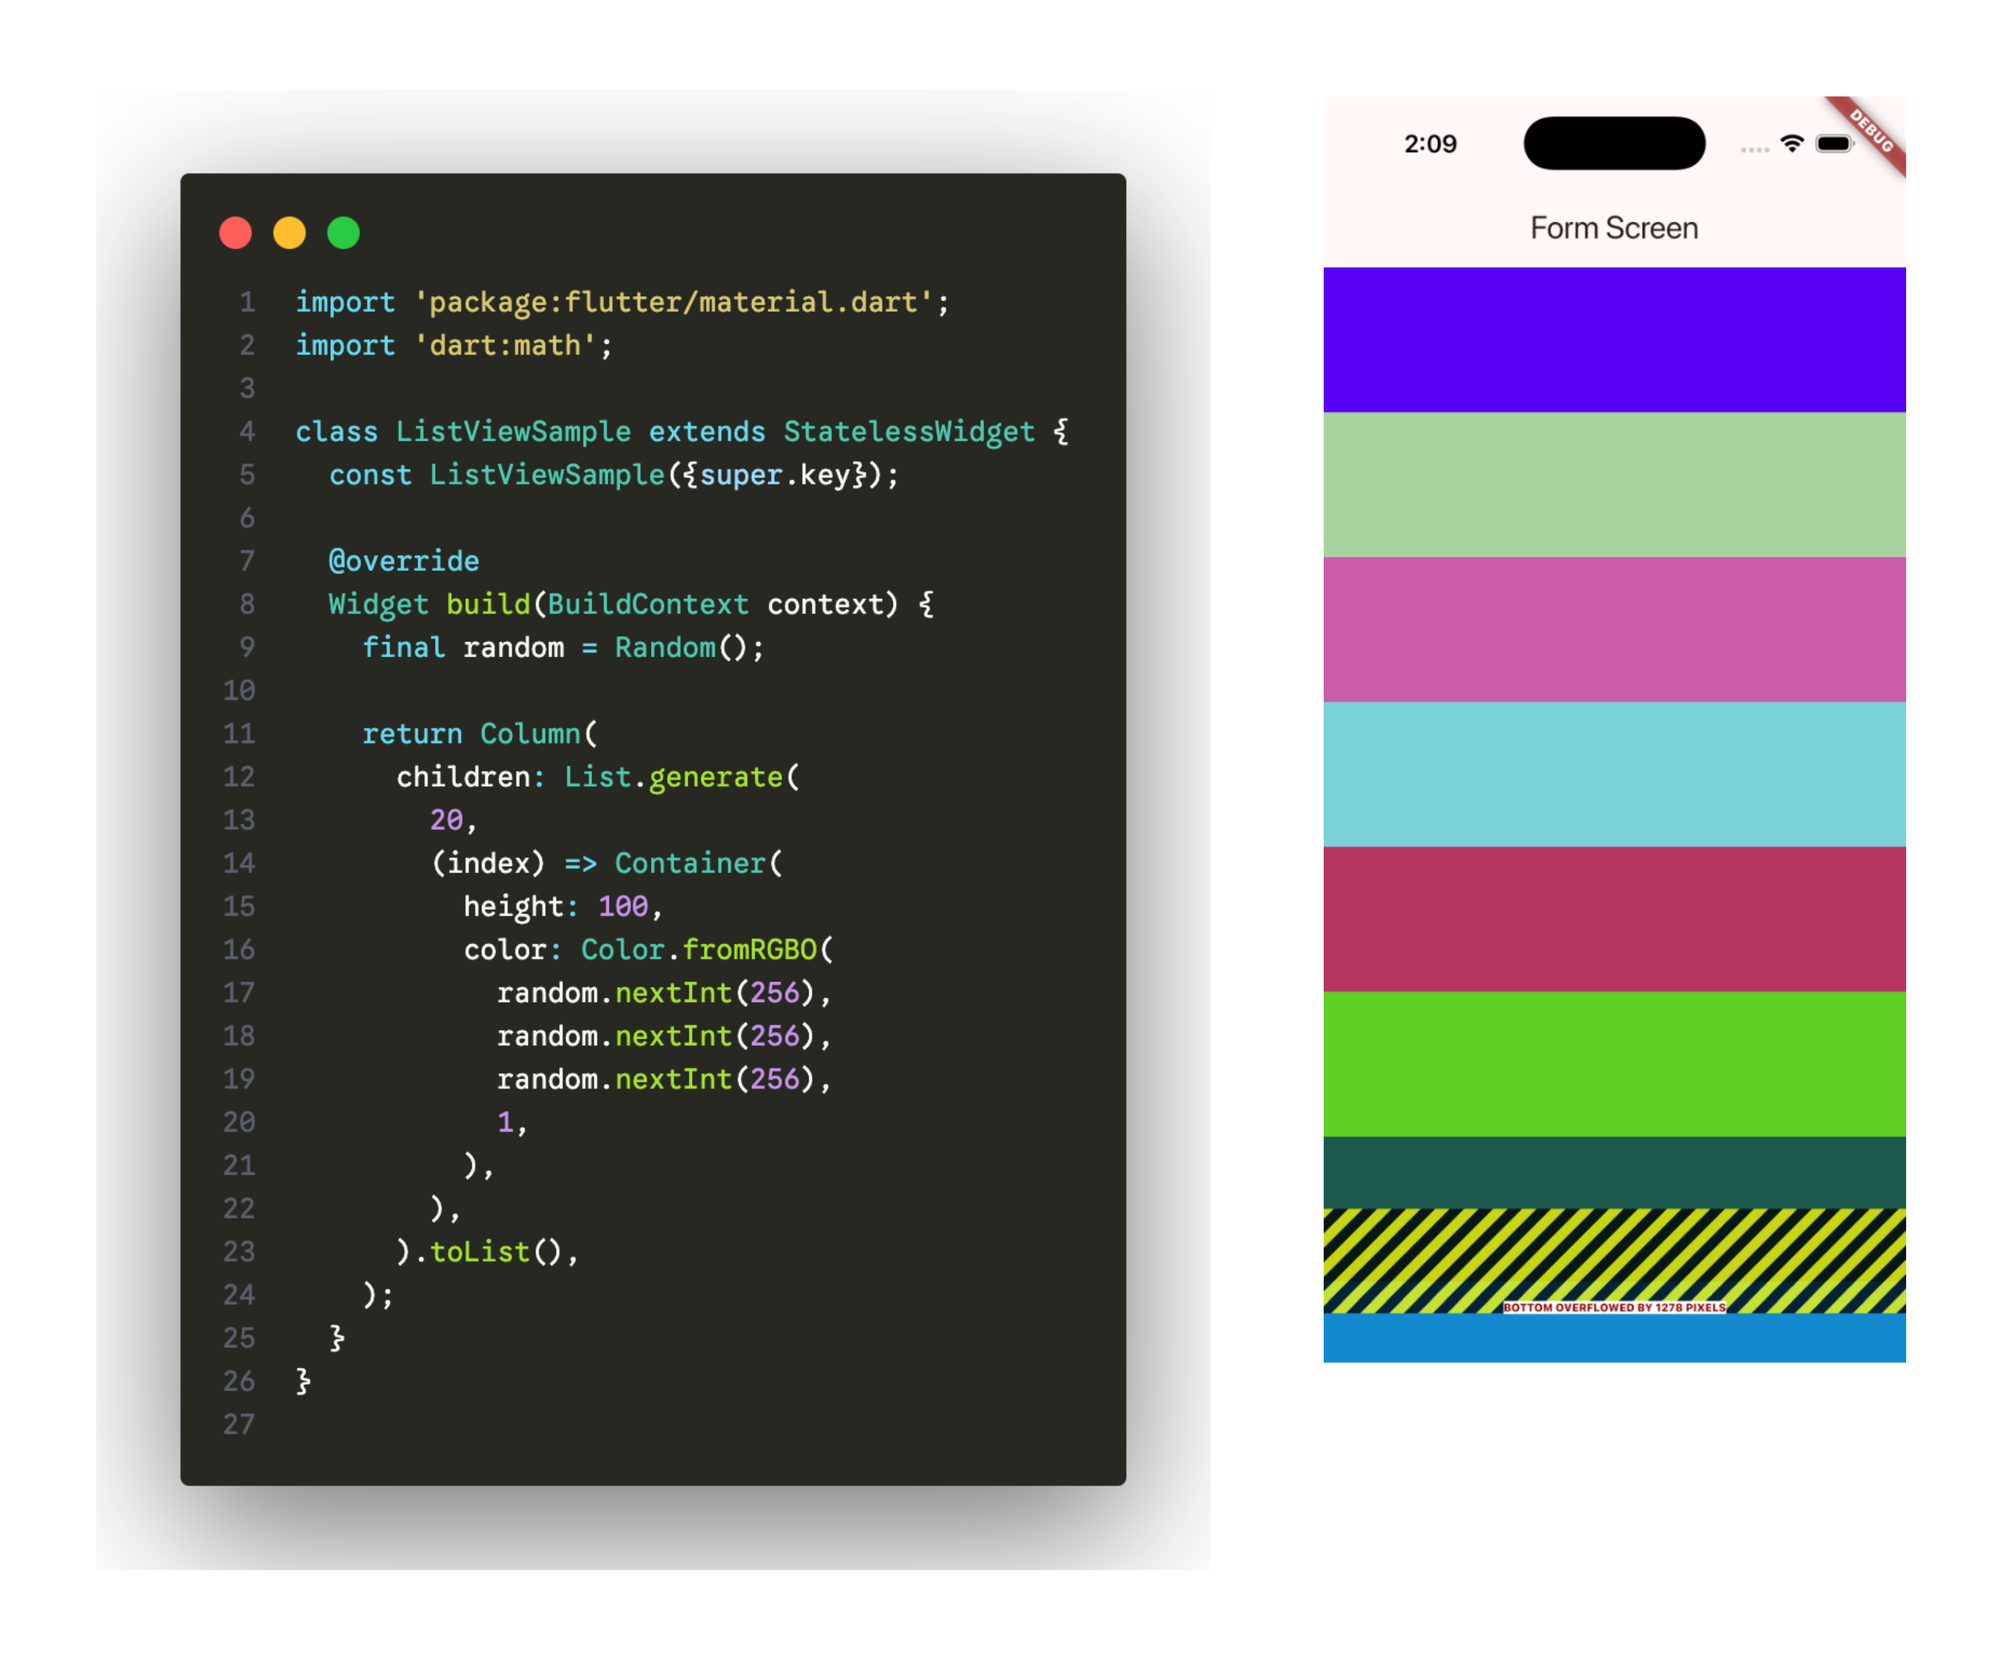
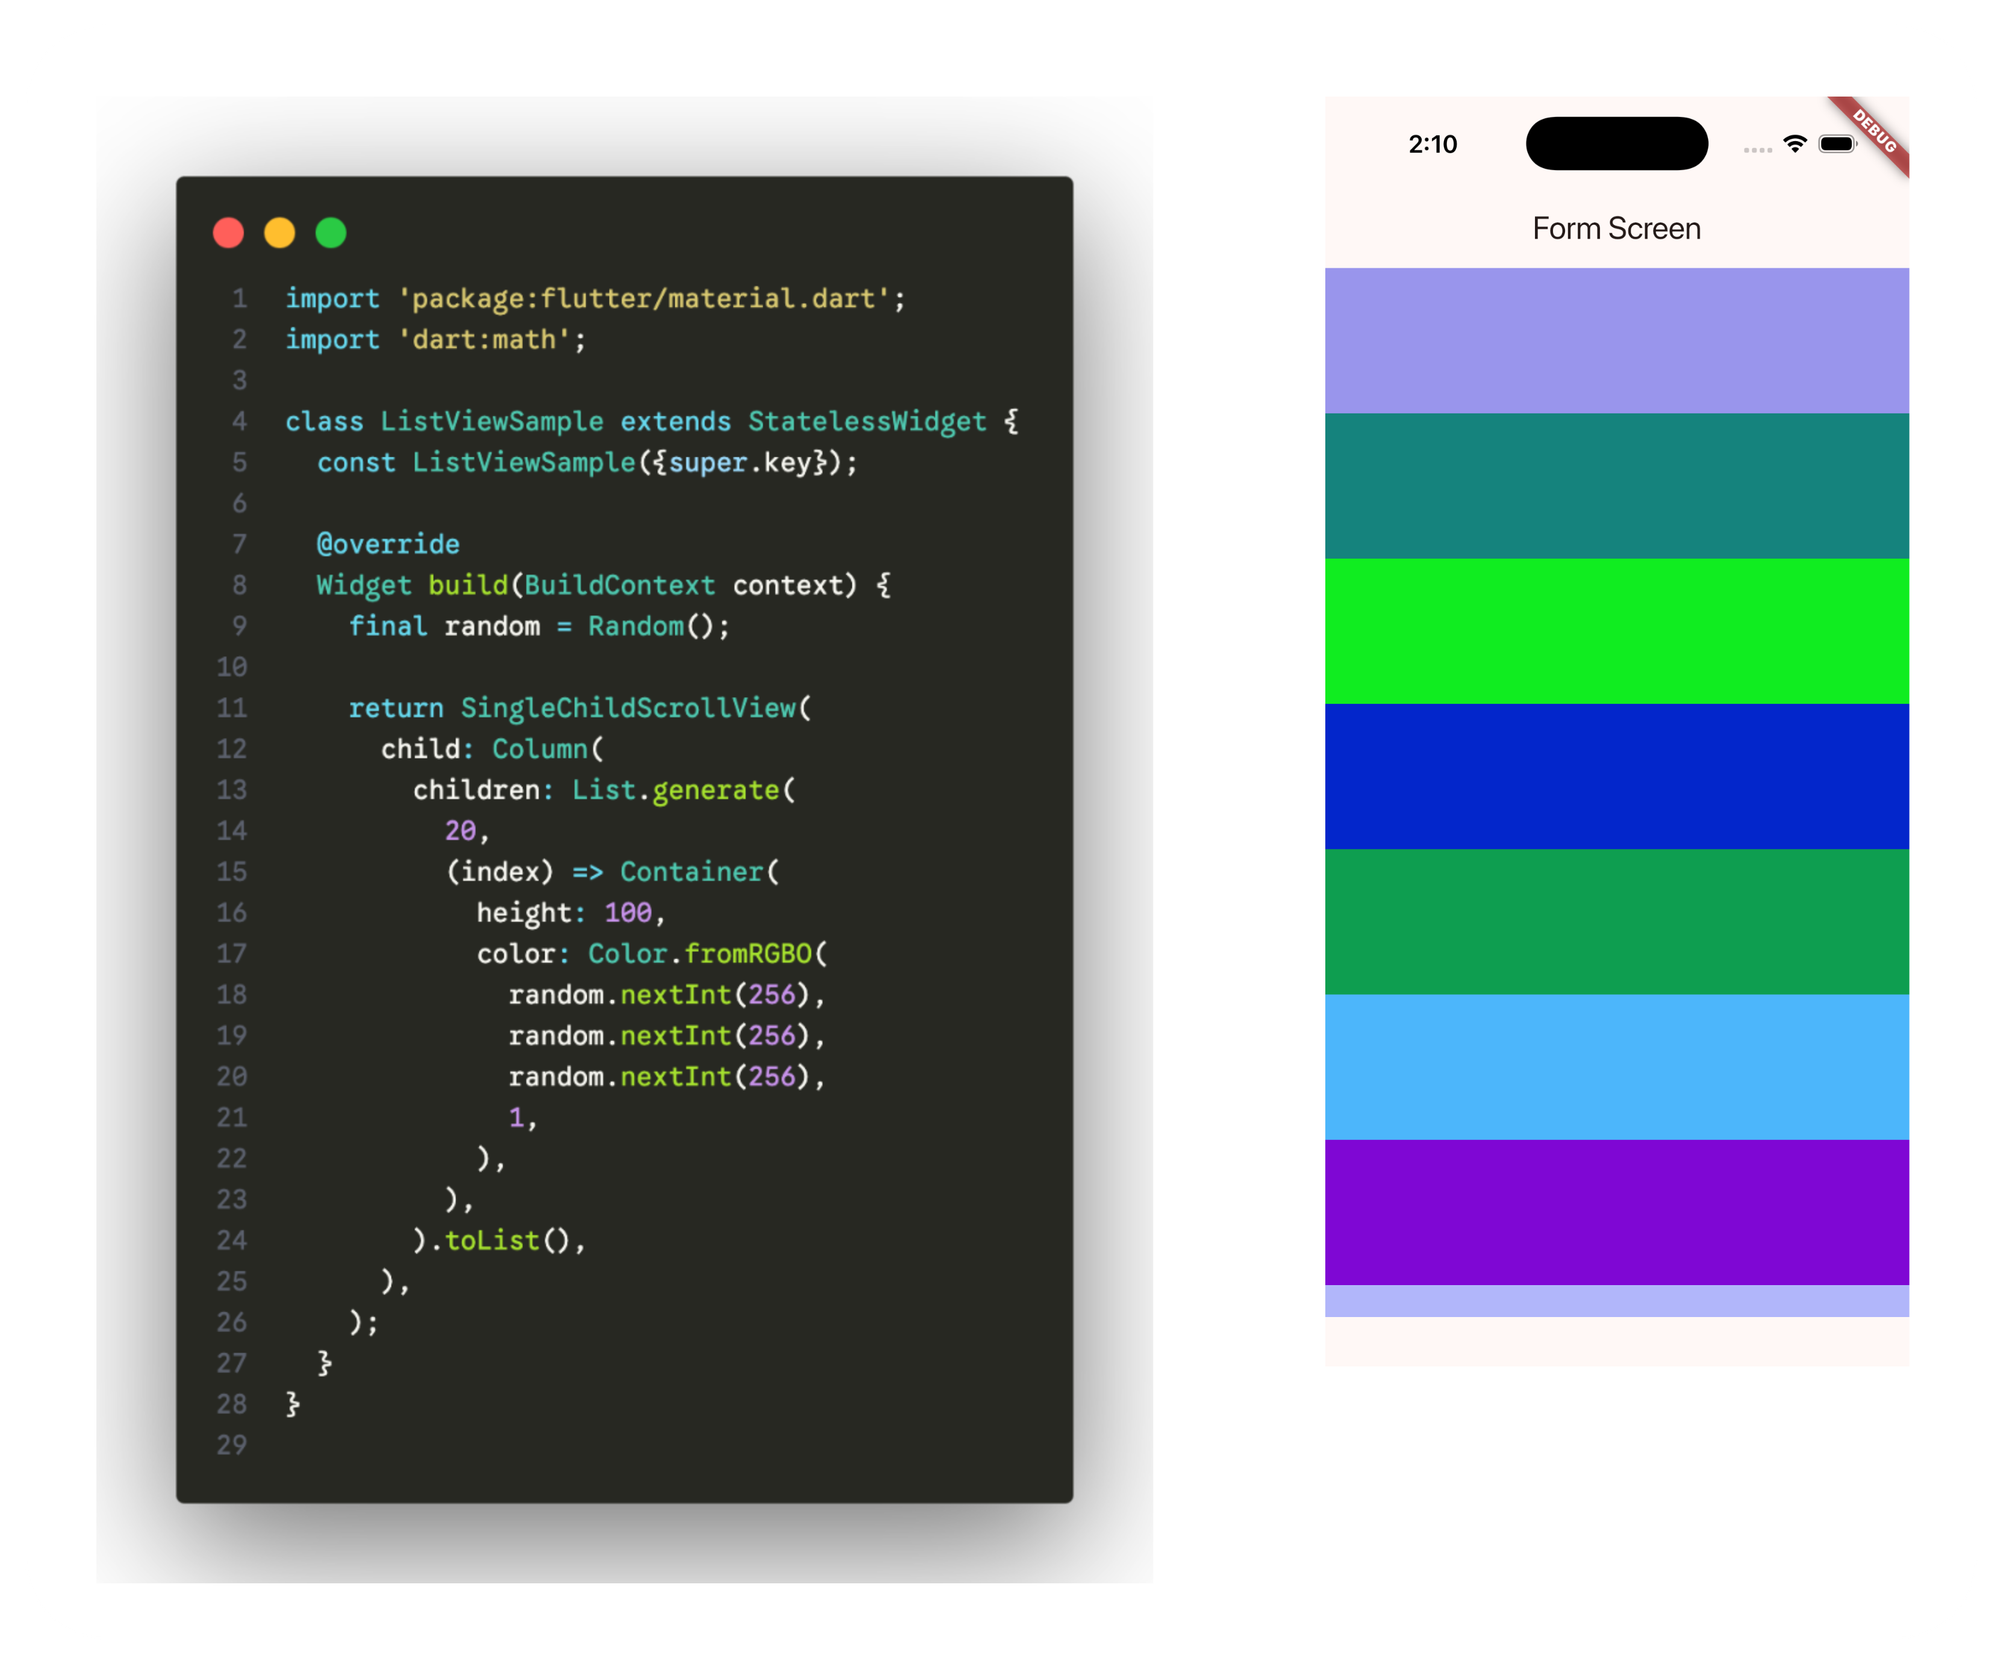
ဒီမှာ ကြည့်မယ်ဆို SingleChildScrollView က နားလည်ရလွယ်ပြီးတော့ ရှင်းလဲ ရှင်းပါတယ်။ Widget ကို SingleChildScrollView နဲ့ wrap လုပ်လိုက်တာနဲ့ scroll လို့ ရသွားတာမျိုးကို တွေ့ရမှာပါ။ ဒီတော့ ဘာကြောင့် အမြဲမသုံးသင့်တာလဲဆိုတာ ဆက်ကြည့်လိုက်ရအောင်ပါ။
import 'package:flutter/material.dart';

class BadContactListExample extends StatelessWidget {
  // Generate 1,000 contacts
  final List<Contact> contacts = List.generate(
    1000,
    (index) => Contact(
      id: index,
      name: "Contact ${index + 1}",
      email: "contact${index + 1}@example.com",
      phone: "+1 (555) ${1000 + index}",
    ),
  );

  @override
  Widget build(BuildContext context) {
    print("🔴 BUILD STARTED - Building screen...");

    return Scaffold(
      appBar: AppBar(
        title: Text("Contacts - The WRONG Way ❌"),
        backgroundColor: Colors.red,
      ),
      body: SingleChildScrollView(
        child: Column(
          children: contacts.map((contact) {
            // THIS PRINTS 1,000 TIMES IMMEDIATELY!
            print("🔴 Building widget for: ${contact.name}");

            return Card(
              margin: EdgeInsets.symmetric(horizontal: 8, vertical: 4),
              child: ListTile(
                leading: CircleAvatar(
                  child: Text(contact.name[0]),
                  backgroundColor: Colors.red[100],
                ),
                title: Text(contact.name),
                subtitle: Text(contact.email),
                trailing: Icon(Icons.chevron_right),
              ),
            );
          }).toList(),
        ),
      ),
    );
  }
}

class Contact {
  final int id;
  final String name;
  final String email;
  final String phone;

  Contact({
    required this.id,
    required this.name,
    required this.email,
    required this.phone,
  });
}
🔴 BUILD STARTED - Building screen...
🔴 Building widget for: Contact 1
🔴 Building widget for: Contact 2
🔴 Building widget for: Contact 3
🔴 Building widget for: Contact 4
...
...
🔴 Building widget for: Contact 998
🔴 Building widget for: Contact 999
🔴 Building widget for: Contact 1000အခုလိုမျိုး build လုပ်တဲ့အချိန် SingleChildScrollView ထဲမှာ ပြရမယ့် data တွေများလာပြီဆိုရင်တော့ performance သိသိသာသာ ကျသွားပြီး scroll လုပ်ရတာ အရမ်း lag ဖြစ်တာကို တွေ့ရမှာပါ။ Log ထဲမှာ ကြည့်မယ်ဆို "🔴 Building widget for: Contact xxx" ဆိုပြီး အကြိမ် ၁၀၀၀ တွေ့မှာပါ။ ဒါကို ကြည့်ခြင်းအားဖြင့် UI ကို render လုပ်တဲ့အခါ အခု ၁၀၀၀ လုံးကို တပြိုင်ထဲ render လုပ်လိုက်တယ်ဆိုတာ တွေ့ရမှာပါ။ မြင်ရတဲ့ view ထဲမှာ တခါမြင်ရင် ၈ခု ၉ခုလောက်ပဲ မြင်ရပေမယ့် အခု ၁၀၀၀ လုံးကို render လုပ်ထားပြီး memory ပေါ်မှာ သိမ်းထားတာမျိုးဖြစ်ပါတယ်။
ဒီတော့ ဘာပြဿနာတွေ ဖြစ်လာသလဲဆိုတော့
Columnက viewport size ကို မသိပါဘူးColumnထဲမှာ ရှိတဲ့ widget တွေကို အကုန်လုံး render လုပ်ပါတယ်- Lazy loading ဆိုတဲ့ လိုမှ render လုပ်တာမျိုး မရှိပါဘူး
- Widget တွေကိုလဲ recycle လုပ်တာမျိုး မရှိပါဘူး
- Widget အခု ၁၀၀၀ လုံး memory ပေါ်မှာ နေရာယူထားပါတယ်
ဒါကြောင့် ရလဒ်အနေနဲ့
- စစချင်း loading လုပ်တာ အခု ၁၀၀၀ လုံးဆိုတော့ ကြာပါတယ်
- Memory usage ကလဲ များပါတယ်
- Scroll လုပ်တာကလဲ smooth မဖြစ်တော့ပါဘူး
- Memory usage များတာကြောင့် crash တာတွေလဲ ဖြစ်သွားနိုင်ပါတယ်
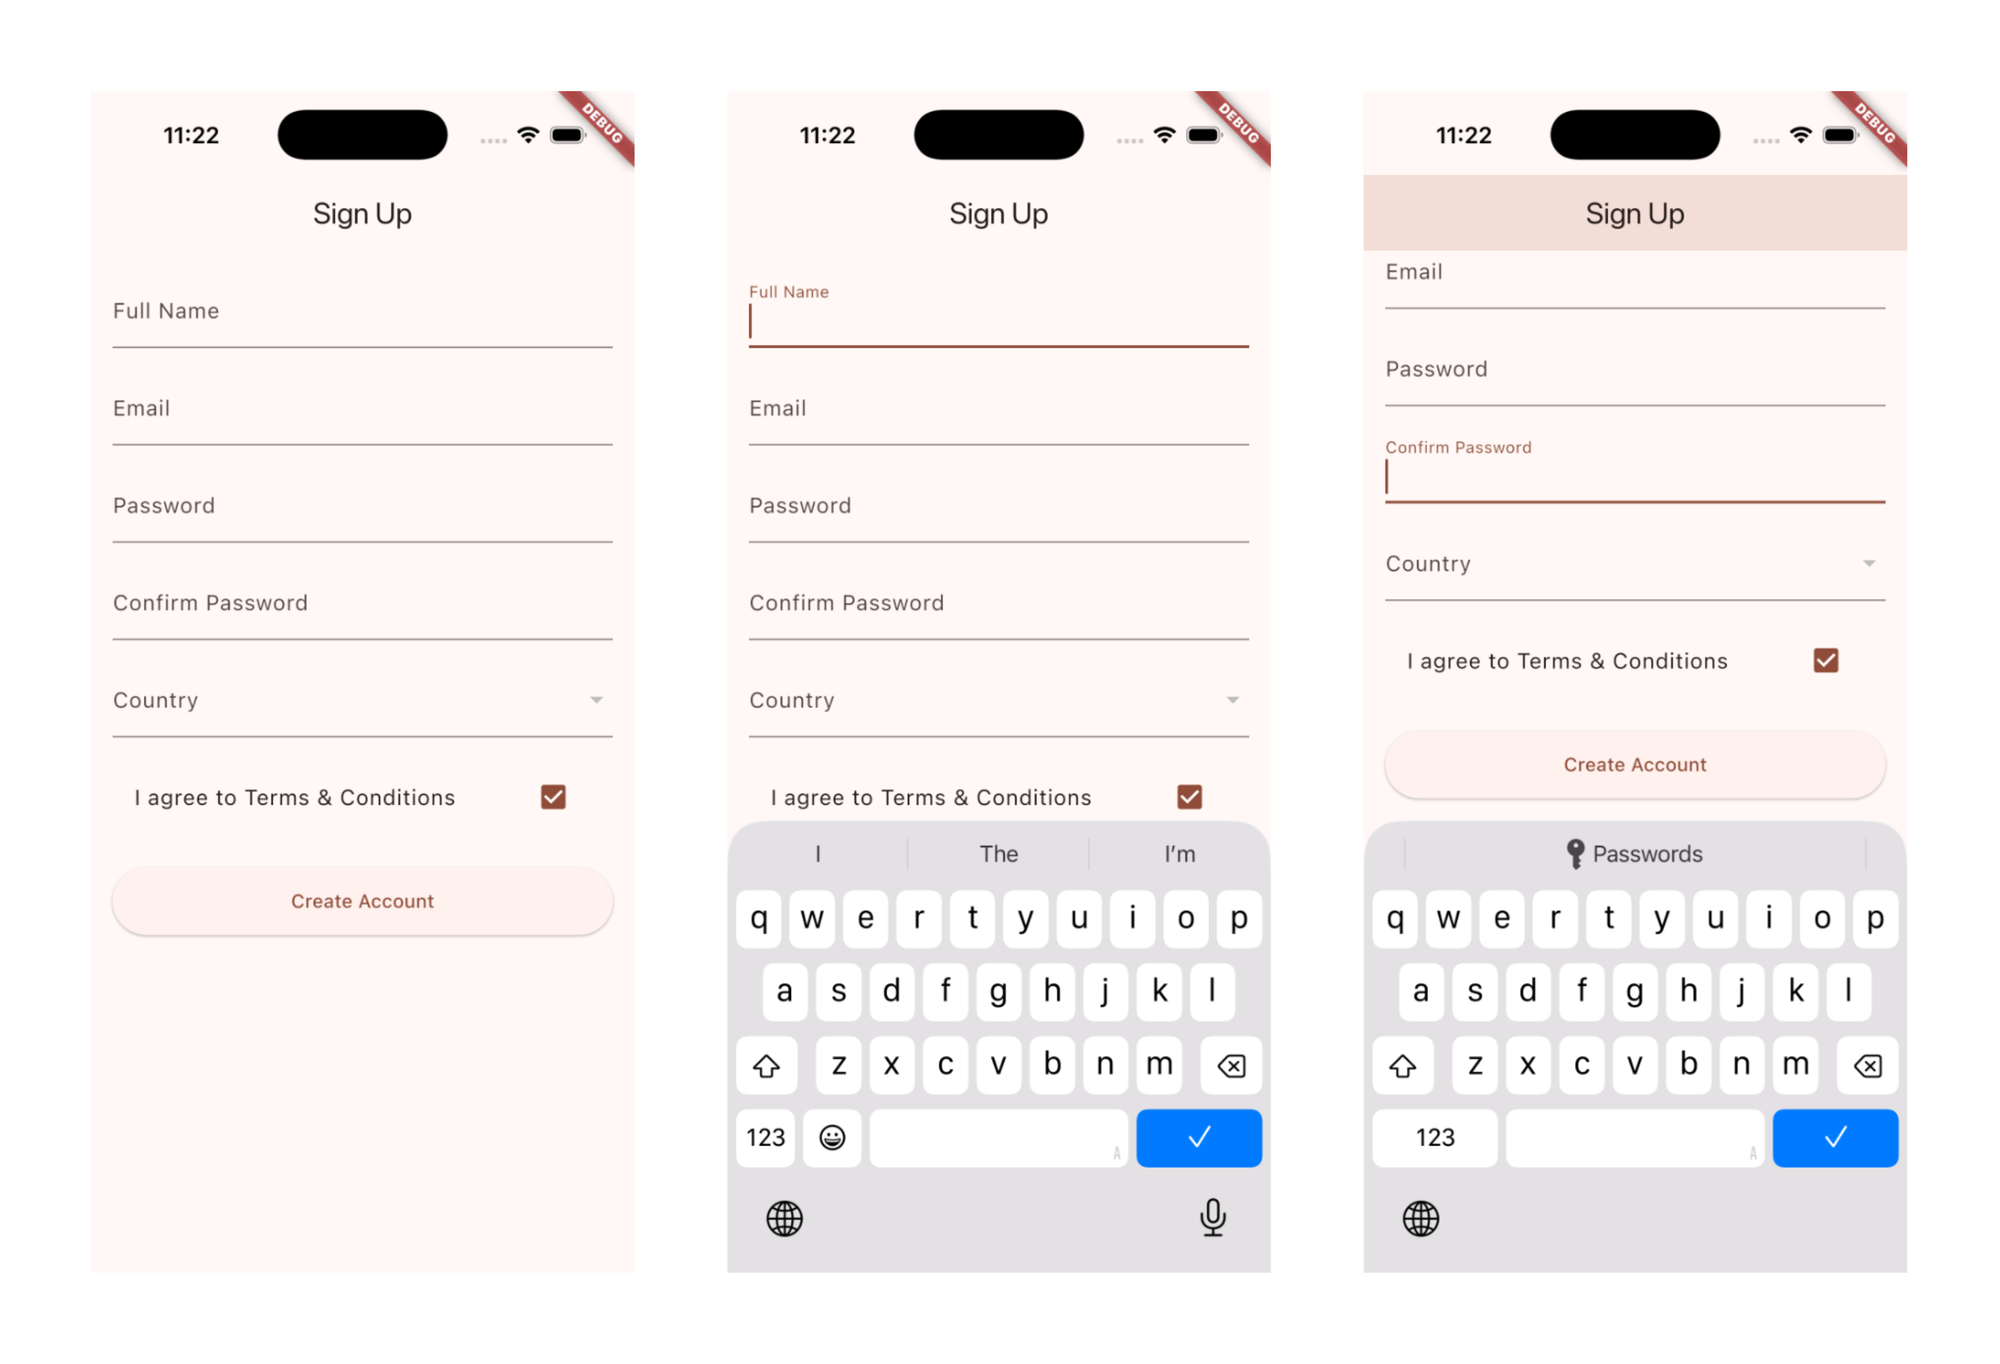
ဒီတော့ SingleChildScrollView ကို ဘယ်တော့မှ မသုံးရဘူးလား ဆိုတော့ သူ့ကို အသုံးပြုလို့ အဆင်ပြေတဲ့နေရာတွေလဲ ရှိပါတယ်။ သူ့ကို child widget တွေ အရမ်းအများကြီး မပါတဲ့ Form လိုမျိုးမှာ အသုံးပြုသင့်ပါတယ်။ လွယ်လွယ်ကူကူနဲ့ widget အနည်းငယ်သာပါတဲ့ Column အတွက်ဆို အသုံးပြုရ အဆင်ပြေပါတယ်။
class RegistrationForm extends StatelessWidget {
  @override
  Widget build(BuildContext context) {
    return Scaffold(
      appBar: AppBar(title: Text("Sign Up")),
      body: SingleChildScrollView(
        padding: EdgeInsets.all(16),
        child: Column(
          children: [
            TextField(decoration: InputDecoration(labelText: "Full Name")),
            SizedBox(height: 16),
            TextField(decoration: InputDecoration(labelText: "Email")),
            SizedBox(height: 16),
            TextField(
              decoration: InputDecoration(labelText: "Password"),
              obscureText: true,
            ),
            SizedBox(height: 16),
            TextField(
              decoration: InputDecoration(labelText: "Confirm Password"),
              obscureText: true,
            ),
            SizedBox(height: 16),
            DropdownButtonFormField(
              items: [],
              onChanged: (val) {},
              decoration: InputDecoration(labelText: "Country"),
            ),
            SizedBox(height: 16),
            CheckboxListTile(
              value: true,
              onChanged: (val) {},
              title: Text("I agree to Terms & Conditions"),
            ),
            SizedBox(height: 24),
            ElevatedButton(
              onPressed: () {},
              child: Text("Create Account"),
              style: ElevatedButton.styleFrom(
                minimumSize: Size(double.infinity, 50),
              ),
            ),
          ],
        ),
      ),
    );
  }
}
ဒီမှာကြည့်မယ်ဆို column ထဲမှာ widget စုစုပေါင်း ၁၃ ခု (main widget ၇ခု, SizedBox ၆ခုလောက်ပဲ ပါတဲ့အတွက် render လုပ်တဲ့အခါ အရမ်းကြီး heavy မဖြစ်ပါဘူး။ widget တွေ အားလုံးကိုလဲ UI တခုထဲမှာ မြင်နိုင်ပါတယ်။ ဒါပေမယ့် keyboard ပွင့်လာတဲ့အခါ UI တွေ အပြင်ကို ထွက်ပြီး overflow မဖြစ်စေချင်တဲ့အတွက် SingleChildScrollView နဲ့ ကြေငြာပေးလိုက်တာပဲ ဖြစ်ပါတယ်။ သူ့ထဲပါတဲ့ widget type တွေကလဲ အကုန်လုံး တူနေတာမျိုး မဟုတ်ဘဲ ကွဲပြားနေတဲ့အတွက် သပ်သပ်စီ render လုပ်ပေးဖို့ လိုအပ်ပါတယ်။
ဒီတော့ Widget ဆင်တူတွေကို ထပ်ခါထပ်ခါ render လုပ်နေတာမျိုးမဟုတ်တဲ့ အခြေအနေဆိုရင် SingleChildScrollView ကို အသုံးပြုဖို့ သင့်တော်ပါတယ်။
Examples
- Forms
- Product detail pages
- About/Help pages
- Mixed layouts
- Anything that's not semantically a list
ListView
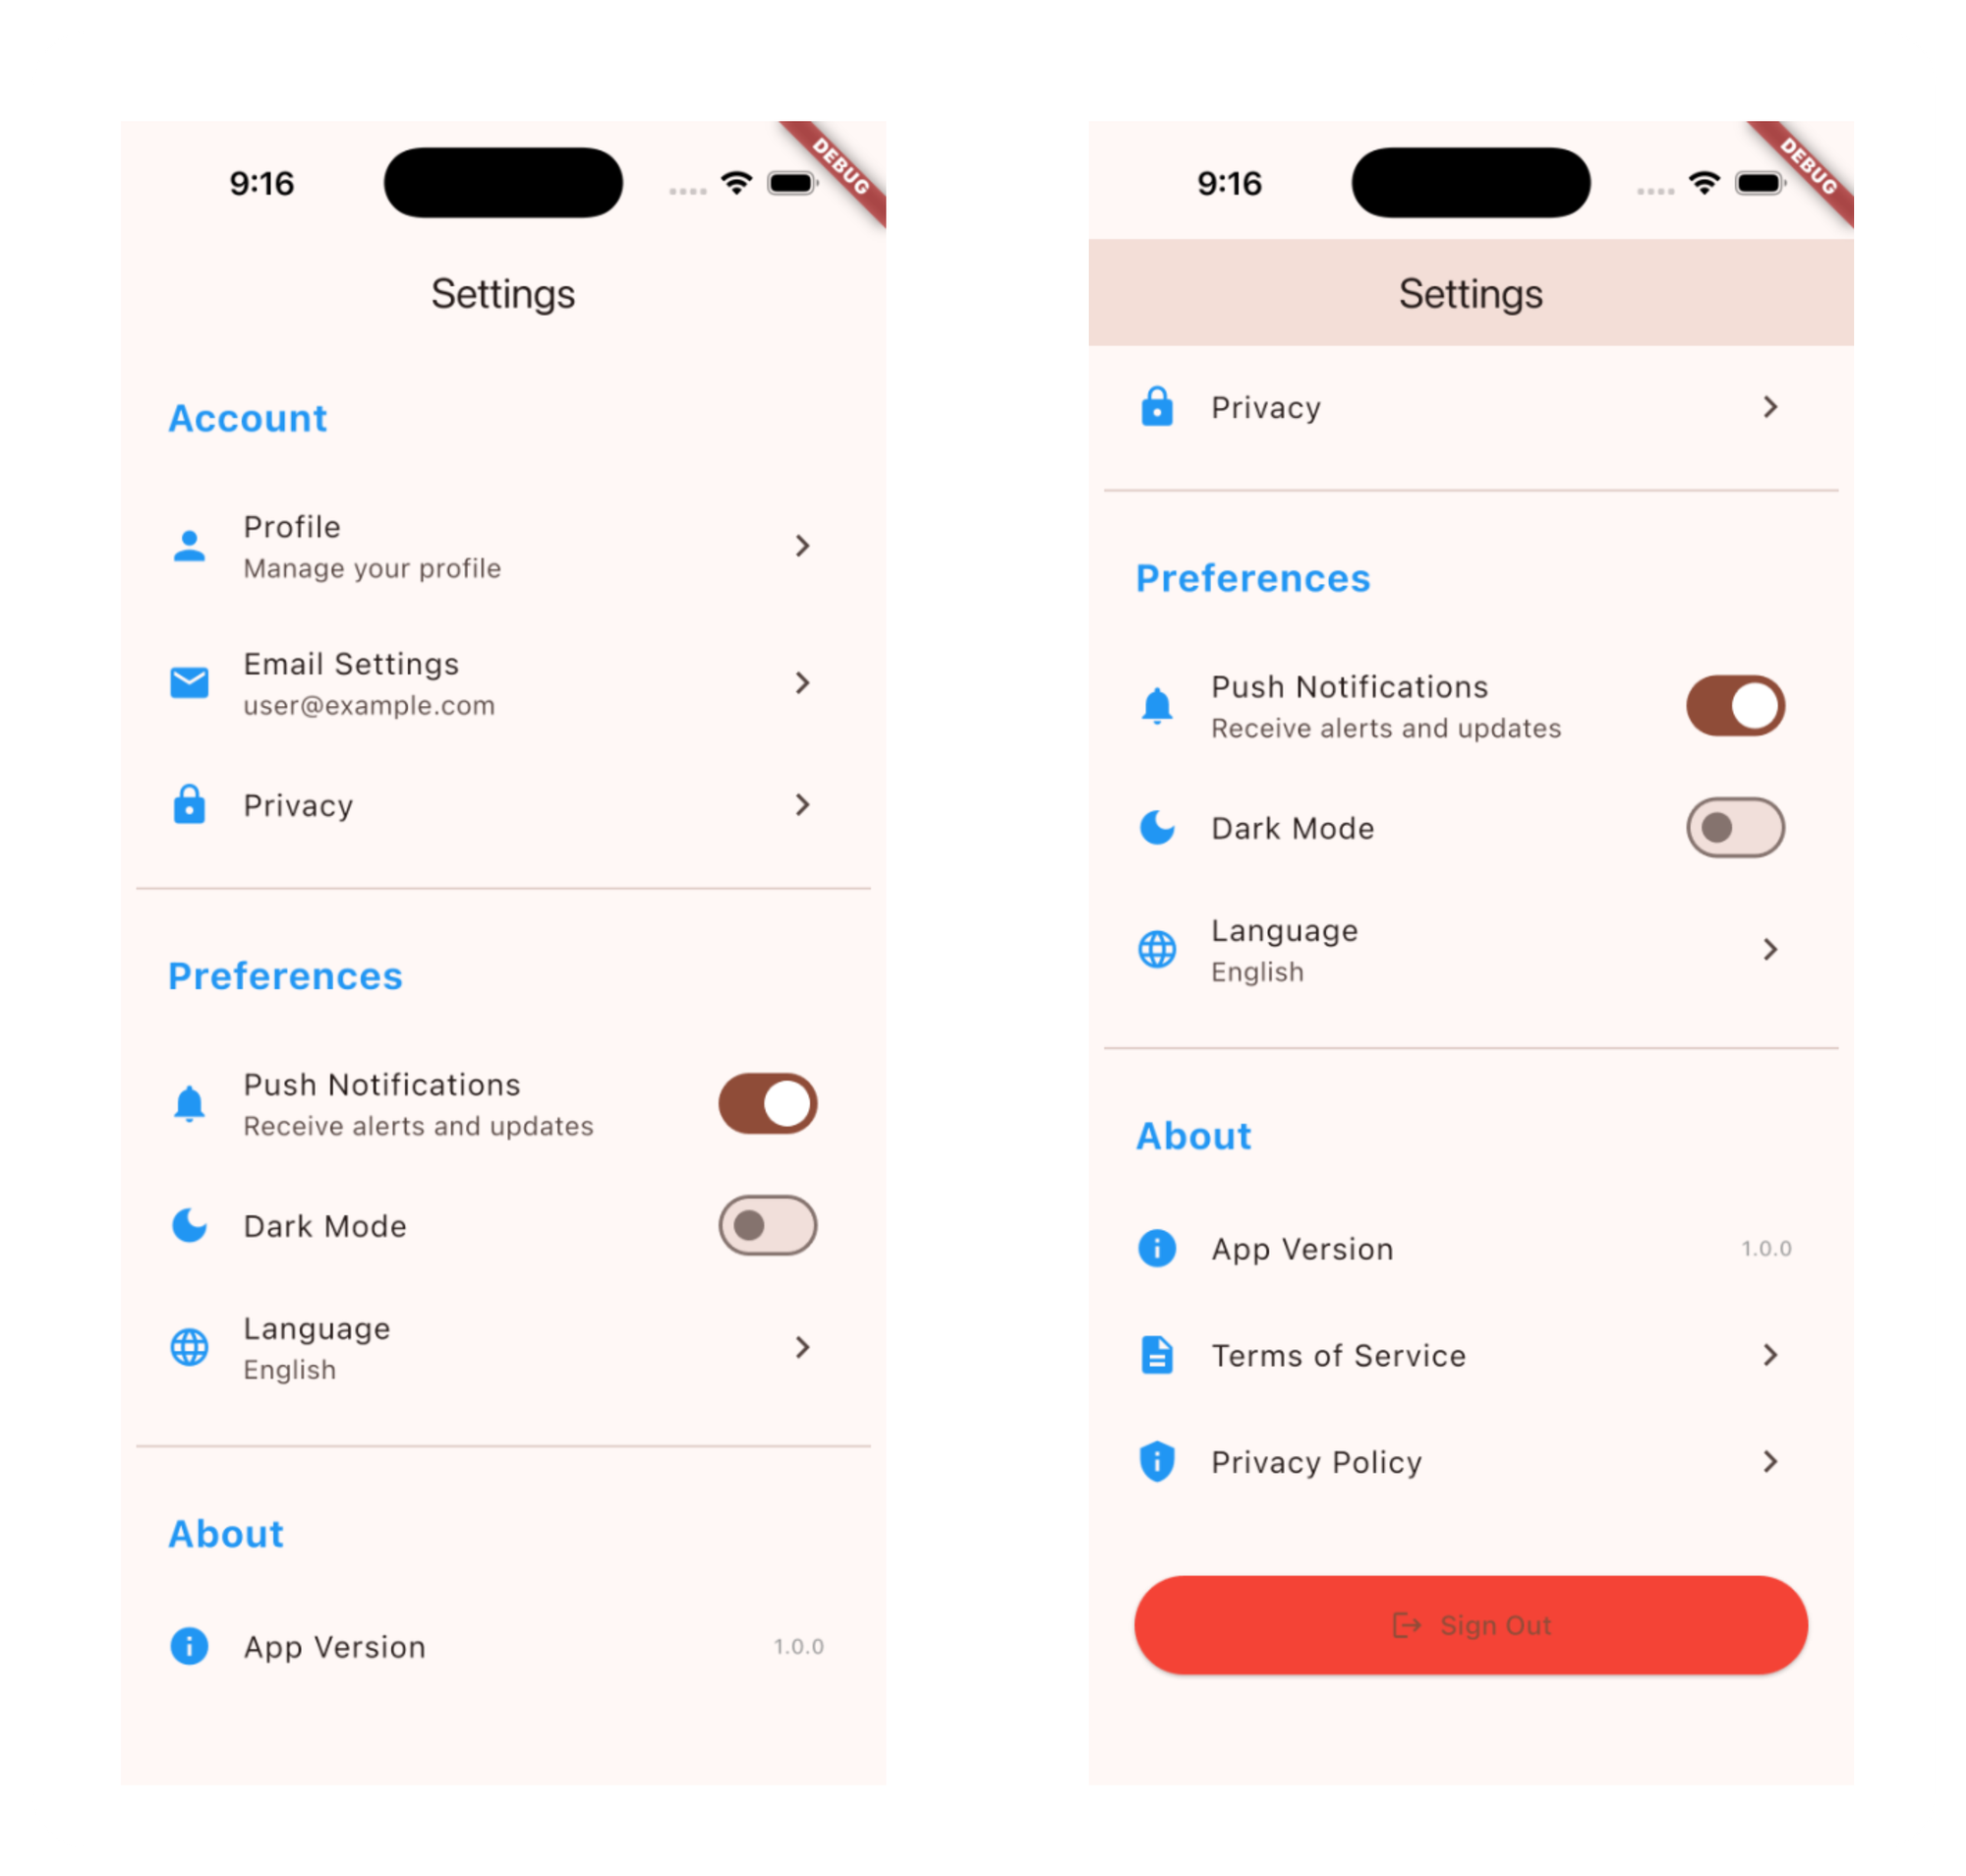
တကယ်လို့ ဆင်တူ child widget အနည်းငယ်ကို scroll လို့ရတဲ့ပုံစံနဲ့ ပြချင်တယ် ပိုပြီးတော့လဲ control လိုချင်တာမျိုးဆိုရင်တော့ ListView ကို သုံးလို့ရပါတယ်။ သူကတော့ Column/Row တို့ ခံထားစရာမလိုဘဲ list ထဲမှာ ပြချင်တာတွေကို တိုက်ရိုက် ရေးသွားလို့ရပါတယ်။ SingleChildScrollView ထက် အနည်းငယ် performance ပိုကောင်းပြီးတော့ screen reader တွေလိုမျိုး သုံးခဲ့ရင်လဲ သူ့ထဲမှာ ကြေငြာထားတဲ့ widget တွေဟာ list ထဲမှာ ပါတာဖြစ်ကြောင်း ပြောပြပါလိမ့်မယ်။
class NavigationMenuExample extends StatelessWidget {
  @override
  Widget build(BuildContext context) {
    return Scaffold(
      appBar: AppBar(title: Text("Settings")),
      body: ListView(
        padding: EdgeInsets.all(8),
        children: [
          // Header section
          Padding(
            padding: EdgeInsets.all(16),
            child: Text(
              "Account",
              style: TextStyle(
                fontSize: 20,
                fontWeight: FontWeight.bold,
                color: Colors.blue,
              ),
            ),
          ),

          // Account items
          ListTile(
            leading: Icon(Icons.person, color: Colors.blue),
            title: Text("Profile"),
            subtitle: Text("Manage your profile"),
            trailing: Icon(Icons.chevron_right),
            onTap: () {},
          ),

          ListTile(
            leading: Icon(Icons.email, color: Colors.blue),
            title: Text("Email Settings"),
            subtitle: Text("user@example.com"),
            trailing: Icon(Icons.chevron_right),
            onTap: () {},
          ),

          ListTile(
            leading: Icon(Icons.lock, color: Colors.blue),
            title: Text("Privacy"),
            trailing: Icon(Icons.chevron_right),
            onTap: () {},
          ),

          Divider(height: 32),

          // Preferences section
          Padding(
            padding: EdgeInsets.all(16),
            child: Text(
              "Preferences",
              style: TextStyle(
                fontSize: 20,
                fontWeight: FontWeight.bold,
                color: Colors.blue,
              ),
            ),
          ),

          SwitchListTile(
            secondary: Icon(Icons.notifications, color: Colors.blue),
            title: Text("Push Notifications"),
            subtitle: Text("Receive alerts and updates"),
            value: true,
            onChanged: (val) {},
          ),

          SwitchListTile(
            secondary: Icon(Icons.dark_mode, color: Colors.blue),
            title: Text("Dark Mode"),
            value: false,
            onChanged: (val) {},
          ),

          ListTile(
            leading: Icon(Icons.language, color: Colors.blue),
            title: Text("Language"),
            subtitle: Text("English"),
            trailing: Icon(Icons.chevron_right),
            onTap: () {},
          ),

          Divider(height: 32),

          // About section
          Padding(
            padding: EdgeInsets.all(16),
            child: Text(
              "About",
              style: TextStyle(
                fontSize: 20,
                fontWeight: FontWeight.bold,
                color: Colors.blue,
              ),
            ),
          ),

          ListTile(
            leading: Icon(Icons.info, color: Colors.blue),
            title: Text("App Version"),
            trailing: Text("1.0.0", style: TextStyle(color: Colors.grey)),
          ),

          ListTile(
            leading: Icon(Icons.description, color: Colors.blue),
            title: Text("Terms of Service"),
            trailing: Icon(Icons.chevron_right),
            onTap: () {},
          ),

          ListTile(
            leading: Icon(Icons.privacy_tip, color: Colors.blue),
            title: Text("Privacy Policy"),
            trailing: Icon(Icons.chevron_right),
            onTap: () {},
          ),

          SizedBox(height: 32),

          // Logout button
          Padding(
            padding: EdgeInsets.symmetric(horizontal: 16),
            child: ElevatedButton.icon(
              onPressed: () {},
              icon: Icon(Icons.logout),
              label: Text("Sign Out"),
              style: ElevatedButton.styleFrom(
                backgroundColor: Colors.red,
                padding: EdgeInsets.all(16),
              ),
            ),
          ),

          SizedBox(height: 16),
        ],
      ),
    );
  }
}
Examples
- Settings menus
- Navigation drawers
- Small lists (<20 items)
- For semantic list
- Better list scroll physics
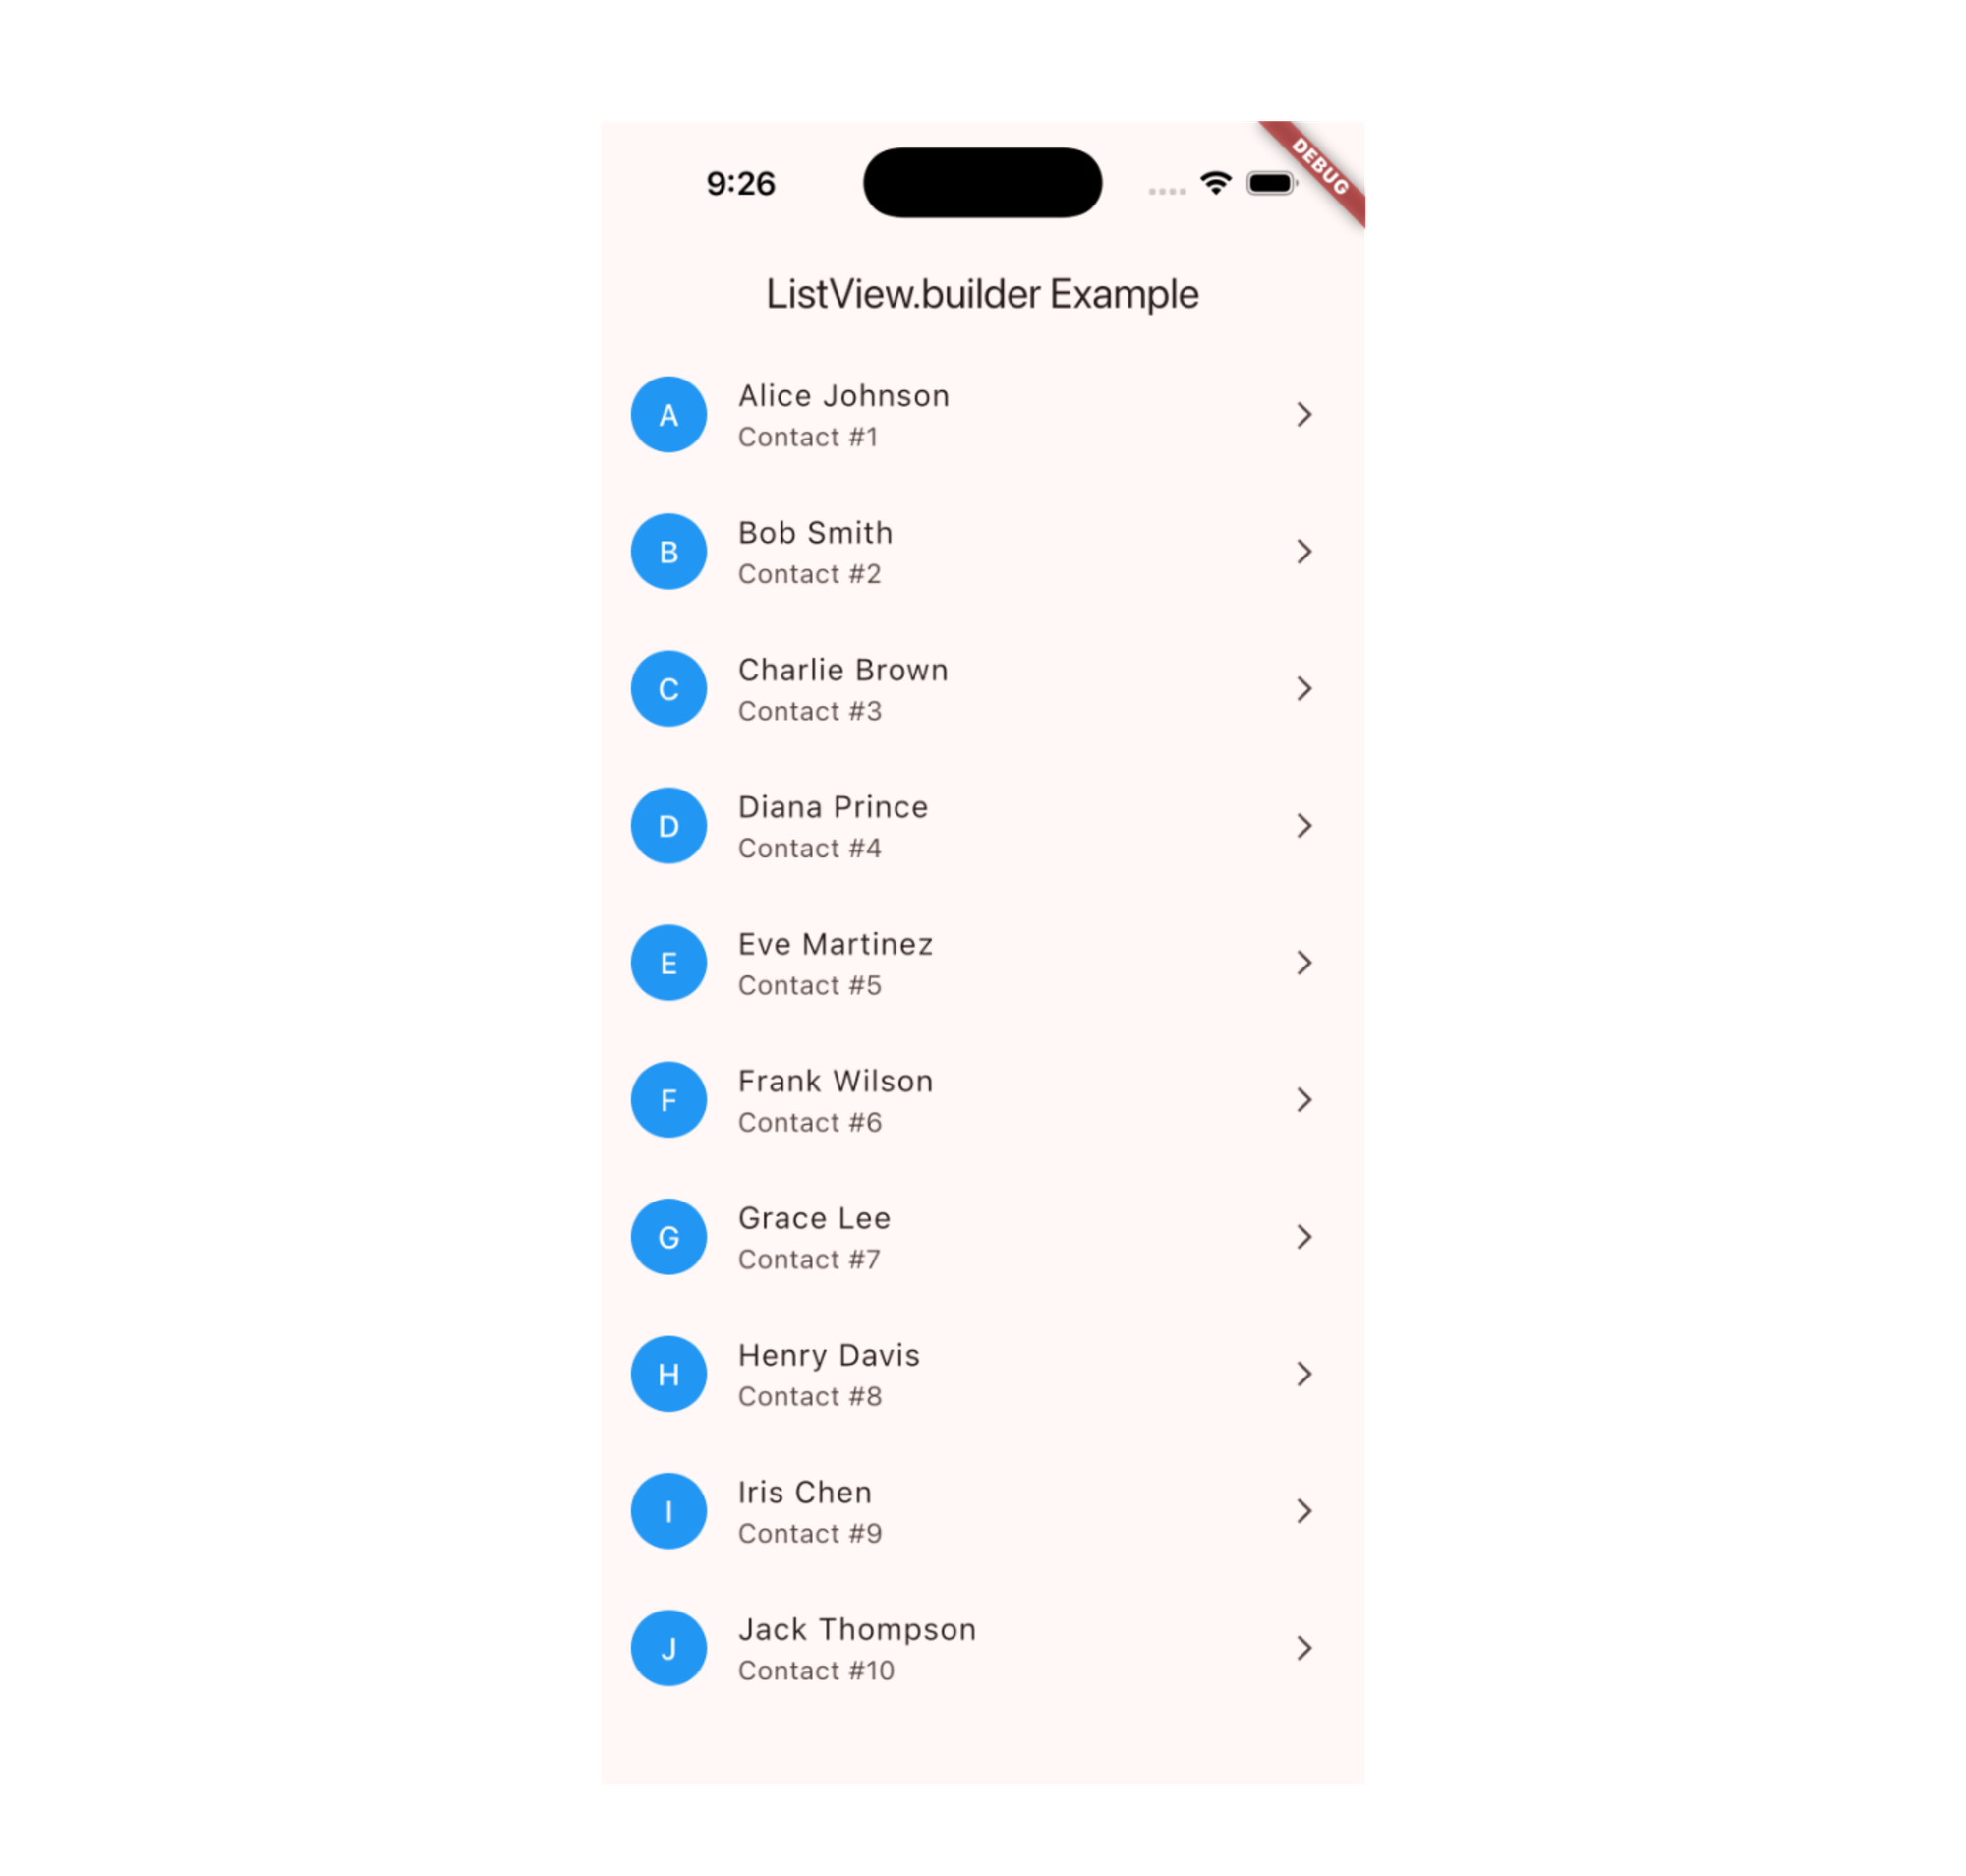
ListView.builder
ဒါပေမယ့် အစမှာ ပြခဲ့တဲ့ product listing လိုမျိုး ဆင်တူ widget တွေကိုပဲ အများကြီး ထပ်ခါထပ်ခါ render လုပ်ဖို့လိုတဲ့အခါ SingleChildScrollView တို့ ListView တို့နဲ့ မလုံလောက်တော့ပါဘူး။ Performance ကောင်းကောင်းနဲ့ လိုအပ်သလောက်ပဲ render လုပ်သွားဖို့ လိုလာပါတယ်။ ဒါကို lazy loading လို့လဲ ခေါ်ပါတယ်။ ဒီလိုအချိန်ဆိုရင်တော့ ListView.builder ကို အသုံးပြုလို့ရပါတယ်။
class ListViewBuilderExample extends StatelessWidget {
  // Simple data list
  final List<String> contacts = [
    'Alice Johnson',
    'Bob Smith',
    'Charlie Brown',
    'Diana Prince',
    'Eve Martinez',
    'Frank Wilson',
    'Grace Lee',
    'Henry Davis',
    'Iris Chen',
    'Jack Thompson',
  ];

  @override
  Widget build(BuildContext context) {
    return Scaffold(
      appBar: AppBar(title: Text('ListView.builder Example')),
      body: ListView.builder(
        itemCount: contacts.length,
        itemBuilder: (context, index) {
          return ListTile(
            leading: CircleAvatar(
              backgroundColor: Colors.blue,
              foregroundColor: Colors.white,
              child: Text(contacts[index][0]),
            ),
            title: Text(contacts[index]),
            subtitle: Text('Contact #${index + 1}'),
            trailing: Icon(Icons.arrow_forward_ios, size: 16),
            onTap: () {
              print('Tapped: ${contacts[index]}');
            },
          );
        },
      ),
    );
  }
}
ListView.separated
တကယ်လို့ ListView လိုမျိုး အပြင် တခုနဲ့တခုကြားက divider ကိုလဲ ကိုယ်လိုချင်သလို သတ်မှတ်ချင်တယ်ဆိုရင်တော့ ListView.separated ကို သုံးလို့ရပါတယ်။ အပေါ်မှာ ပြခဲ့တဲ့ ListView.builder နဲ့ အလုပ်လုပ်ပုံ တူပြီးတော့ သူ့ဆီမှာ separatorBuilder ဆိုတဲ့ Custom divider ဆောက်လို့ရတဲ့ logic အပိုပါလာတာ ဖြစ်ပါတယ်။
class ListViewSeparatedExample extends StatelessWidget {
  final List<String> messages = [
    'Hey! How are you?',
    'Meeting at 3pm today',
    'Don\'t forget to review the code',
    'Lunch tomorrow?',
    'Thanks for your help!',
    'See you at the conference',
    'Great presentation today',
    'Can you send me the files?',
  ];

  @override
  Widget build(BuildContext context) {
    return Scaffold(
      appBar: AppBar(title: Text('ListView.separated Example')),
      body: ListView.separated(
        itemCount: messages.length,
        separatorBuilder: (context, index) {
          return Divider(
            color: Colors.grey,
            thickness: 1,
            indent: 16, // Space from left
            endIndent: 16, // Space from right
          );
        },
        itemBuilder: (context, index) {
          return ListTile(
            leading: Icon(Icons.message, color: Colors.green),
            title: Text(messages[index]),
            subtitle: Text('${index + 1}m ago'),
            trailing: Icon(Icons.arrow_forward_ios, size: 16),
          );
        },
      ),
    );
  }
}
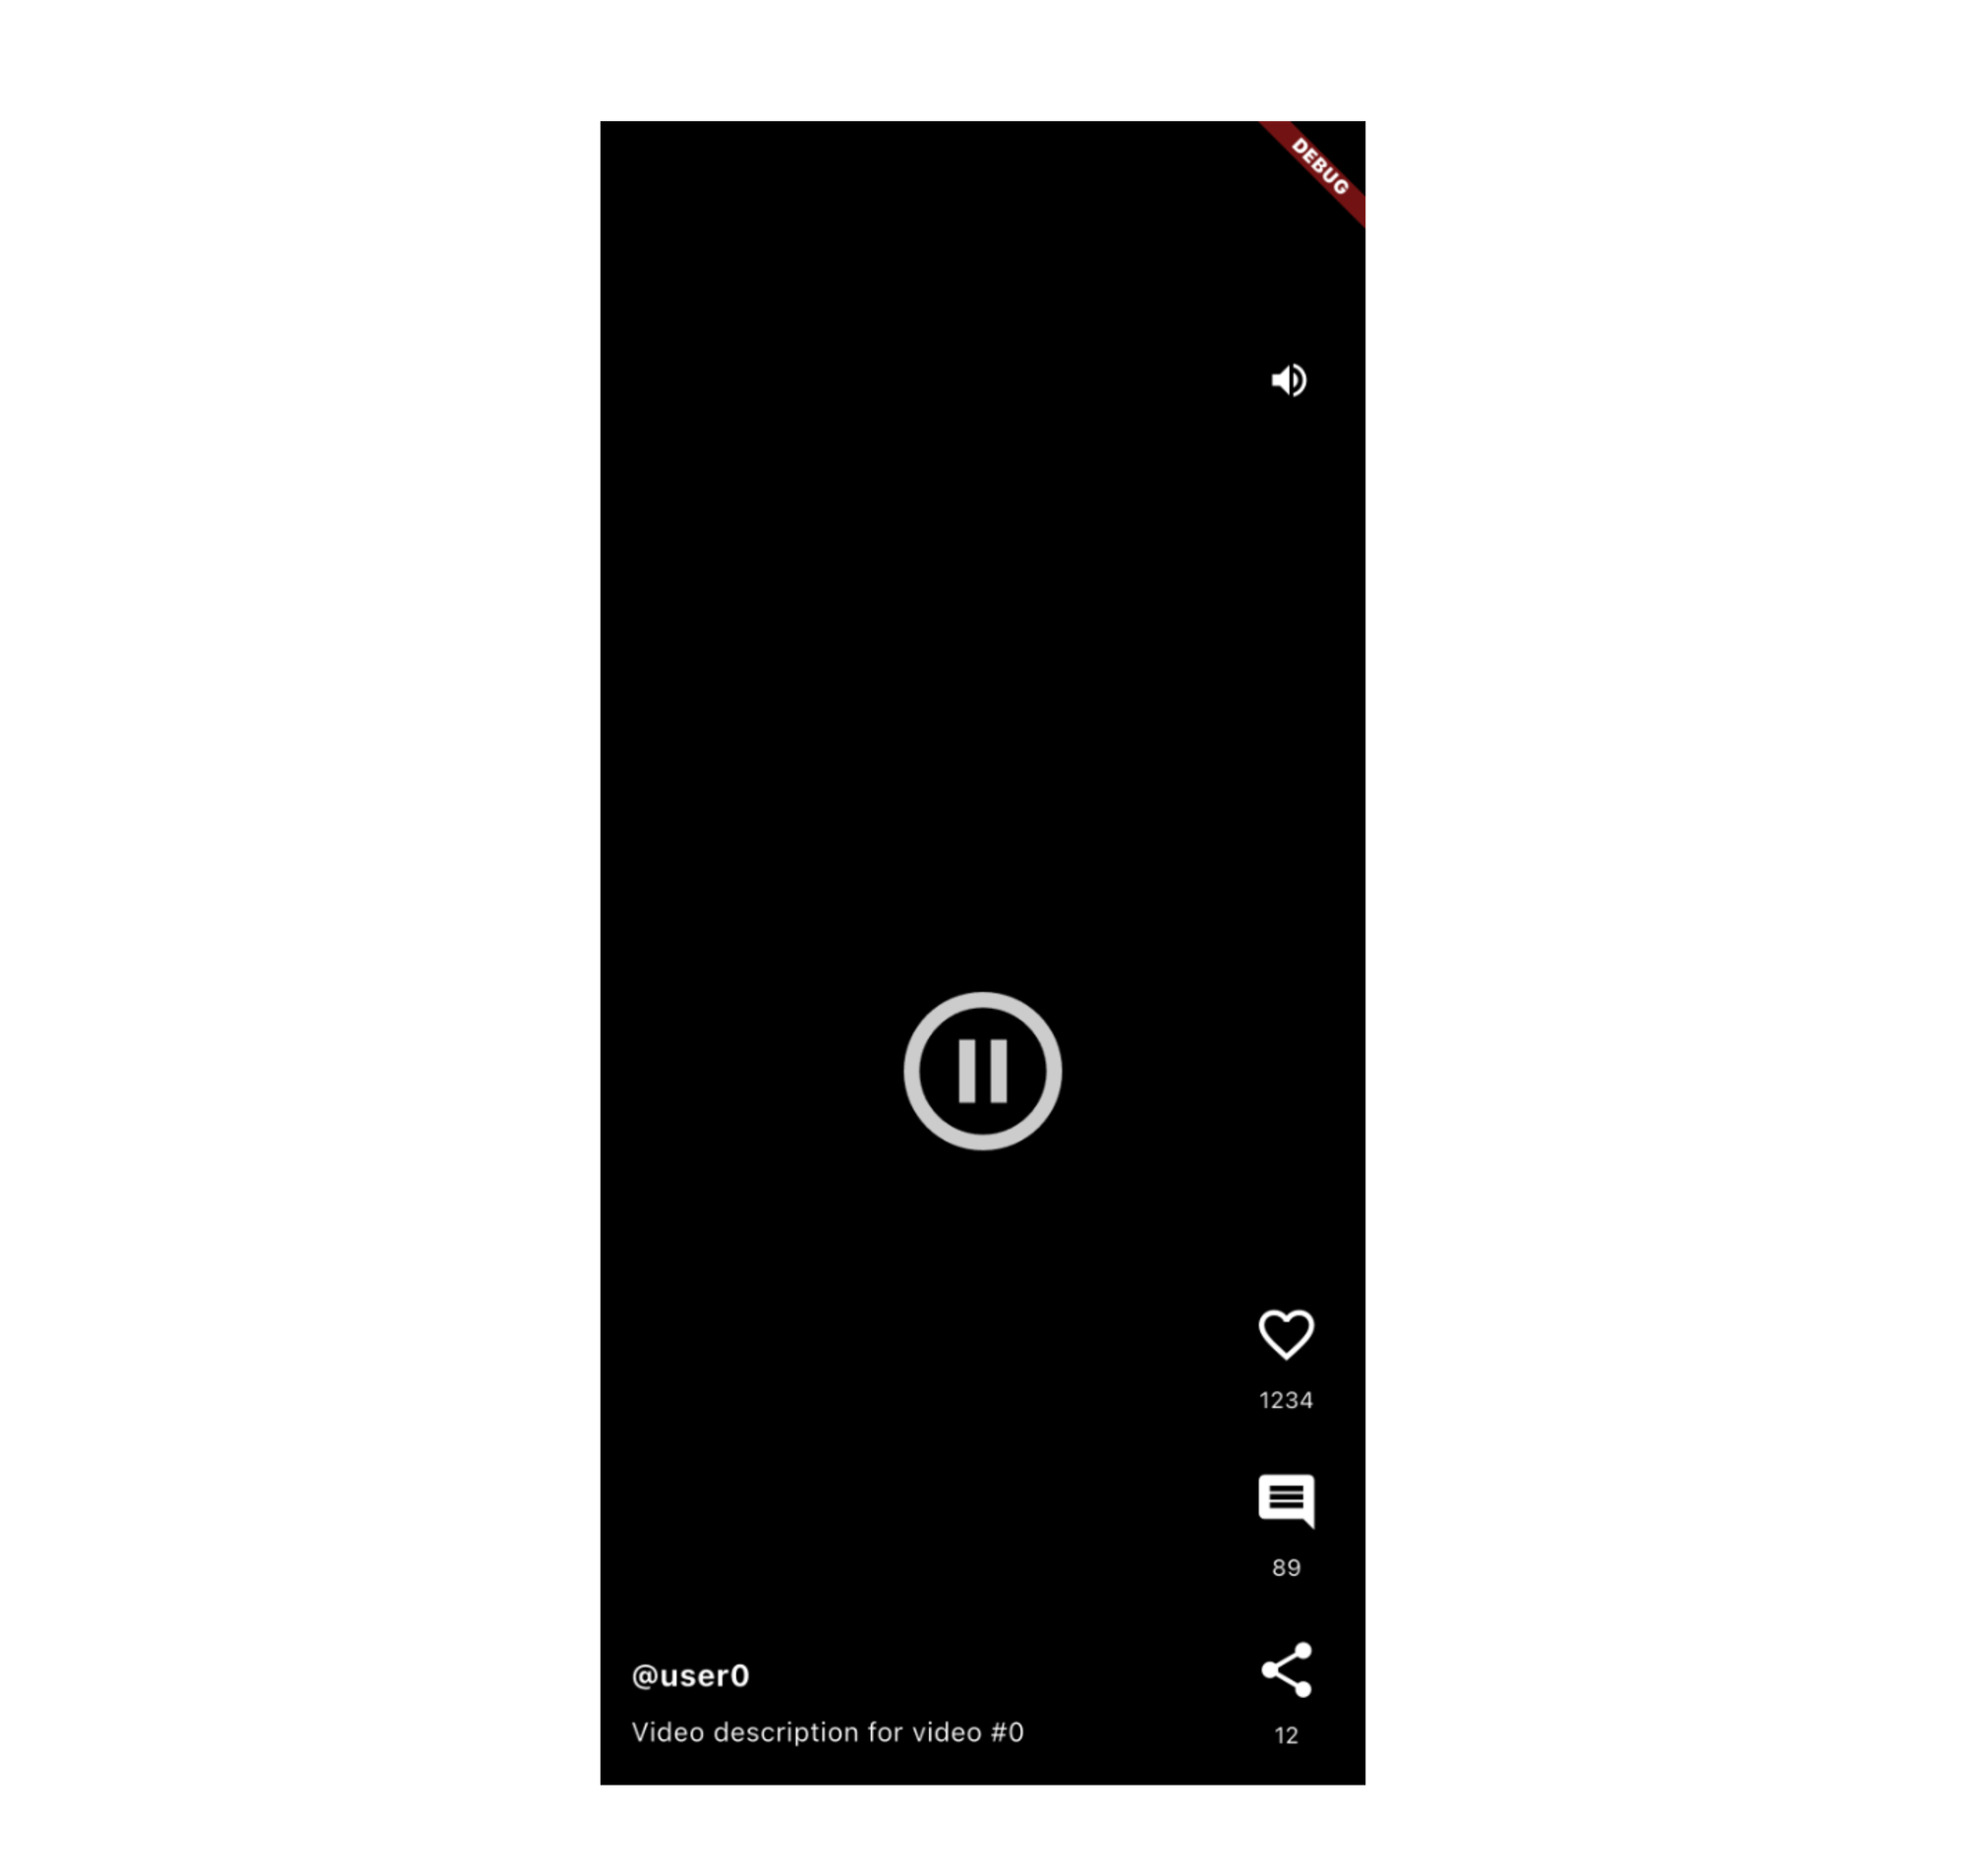
ListView.custom
ListView.builder တို့ ListView.separated တို့ အလုပ်လုပ်ပုံက view ထဲမှာ မရှိတော့တာတွေကို render မလုပ်တော့ဘဲ memory အသုံး သက်သာအောင် လုပ်ပါတယ်။ ဒါပေမယ့် တချို့ အခြေအနေတွေမှာတော့ widget တွေ view ထဲမှာ မရှိတော့ပေမယ့် သူတို့ကို dispose ဖြစ်မသွားအောင် လုပ်ဖို့ လိုတာမျိုးတွေ ရှိတတ်ပါတယ်။ ဥပမာ video player တို့, complex ဖြစ်တဲ့ form လိုမျိုးတွေ view ထဲမှာ မရှိတော့ပေမယ့် သူတို့ကို dispose မလုပ်စေချင်တဲ့အခါ chart တို့ graph တို့ animation တို့လို repaint တွေကို optimize လုပ်ဖို့ လိုတဲ့အခါ cache လုပ်တာကို control လုပ်ချင်တဲ့အခါမျိုးမှာတော့ ListView.custom ကို အသုံးပြုနိုင်ပါတယ်။ Tiktok တို့, Youtube short တို့မှာ အသုံးပြုတဲ့ video တွေကို ဥပမာ မြင်ကြည့်လို့ရပါတယ်။
class VideoFeedExample extends StatelessWidget {
  @override
  Widget build(BuildContext context) {
    return Scaffold(
      backgroundColor: Colors.black,
      body: ListView.custom(
        physics: PageScrollPhysics(),
        cacheExtent: 1000.0,
        childrenDelegate: SliverChildBuilderDelegate(
          (context, index) {
            return VideoFeedItem(videoIndex: index);
          },
          childCount: 50,
          addAutomaticKeepAlives: true,
          addRepaintBoundaries: true,
          addSemanticIndexes: true,
        ),
      ),
    );
  }
}

class VideoFeedItem extends StatefulWidget {
  final int videoIndex;

  const VideoFeedItem({super.key, required this.videoIndex});

  @override
  _VideoFeedItemState createState() => _VideoFeedItemState();
}

class _VideoFeedItemState extends State<VideoFeedItem>
    with AutomaticKeepAliveClientMixin {
  bool isPlaying = true;
  bool isMuted = false;
  bool isLiked = false;
  int likeCount = 1234;

  @override
  bool get wantKeepAlive => true;

  @override
  Widget build(BuildContext context) {
    super.build(context); // Required for keep alive

    return Container(
      height: MediaQuery.of(context).size.height,
      color: Colors.black,
      child: Stack(
        children: [
          Center(
            child: Icon(
              isPlaying
                  ? Icons.pause_circle_outline
                  : Icons.play_circle_outline,
              size: 100,
              color: Colors.white.withOpacity(0.8),
            ),
          ),

          Positioned(
            bottom: 80,
            left: 16,
            right: 80,
            child: Column(
              crossAxisAlignment: CrossAxisAlignment.start,
              children: [
                Text(
                  '@user${widget.videoIndex}',
                  style: TextStyle(
                    color: Colors.white,
                    fontWeight: FontWeight.bold,
                    fontSize: 16,
                  ),
                ),
                SizedBox(height: 8),
                Text(
                  'Video description for video #${widget.videoIndex}',
                  style: TextStyle(color: Colors.white),
                ),
              ],
            ),
          ),
          Positioned(
            bottom: 80,
            right: 16,
            child: Column(
              children: [
                IconButton(
                  icon: Icon(
                    isLiked ? Icons.favorite : Icons.favorite_border,
                    color: isLiked ? Colors.red : Colors.white,
                    size: 35,
                  ),
                  onPressed: () {
                    setState(() {
                      isLiked = !isLiked;
                      likeCount += isLiked ? 1 : -1;
                    });
                  },
                ),
                Text(
                  '$likeCount',
                  style: TextStyle(color: Colors.white, fontSize: 12),
                ),
                SizedBox(height: 20),
                IconButton(
                  icon: Icon(Icons.comment, color: Colors.white, size: 35),
                  onPressed: () {},
                ),
                Text('89', style: TextStyle(color: Colors.white, fontSize: 12)),
                SizedBox(height: 20),
                IconButton(
                  icon: Icon(Icons.share, color: Colors.white, size: 35),
                  onPressed: () {},
                ),
                Text('12', style: TextStyle(color: Colors.white, fontSize: 12)),
              ],
            ),
          ),

          Positioned.fill(
            child: GestureDetector(
              onTap: () {
                setState(() {
                  isPlaying = !isPlaying;
                });
              },
              child: Container(color: Colors.transparent),
            ),
          ),

          Positioned(
            top: 50,
            right: 16,
            child: IconButton(
              icon: Icon(
                isMuted ? Icons.volume_off : Icons.volume_up,
                color: Colors.white,
              ),
              onPressed: () {
                setState(() {
                  isMuted = !isMuted;
                });
              },
            ),
          ),
        ],
      ),
    );
  }
}
Use ListView.custom when:
| Use Case | Why Custom? | Key Feature |
|---|---|---|
| Video Feed (Tiktok, Reels) | Keep video players alive when scrolled | addAutomaticKeepAlives: true |
| Stock Chart List | Isolate anmiations to avoid repaints | addRepaintBoundaries: true |
| Image Gallery | Preload images smoothly | cacheExtent: 500.0 |
| Accessible App | Proper screen reader announcements | addSemanticIndexes: true |
| Game Leaderboard | Keep complex widgets alive | addAutomaticKeepAlives: true |
| Form with Sections | Preserve field state when scrolling | AutomaticKeepAliveClientMixin |
ဒီနေ့ Day 23 အတွက်ကတော့ ဒီလောက်ပဲ ဖြစ်ပါတယ်။ အဆုံးထိ ဖတ်ပေးတဲ့အတွက် အများကြီး ကျေးဇူးတင်ပါတယ်။ နားမလည်တာတွေ အဆင်မပြေတာတွေ ရှိခဲ့ရင်လဲ အောက်မှာပေးထားတဲ့ discord server ထဲမှာ လာရောက်ဆွေးနွေးနိုင်ပါတယ်။ နောက်နေ့တွေမှာလဲ ဆက်လက်ပြီး sharing လုပ်သွားပေးသွားမှာ ဖြစ်တဲ့အတွက် subscribe လုပ်ထားဖို့ ဖိတ်ခေါ်ပါတယ်။
- Youtube: https://www.youtube.com/@arkarmintun
- Newsletter: https://arkar.dev/
- Discord: https://discord.gg/3xUJ6k6dkH